Getting Started with ROIs
ROIs (Regions of Interest) can be defined on any camera. They give you insight into specific areas of your site, allowing you to more easily isolate the data that you really need.
Creating an ROI
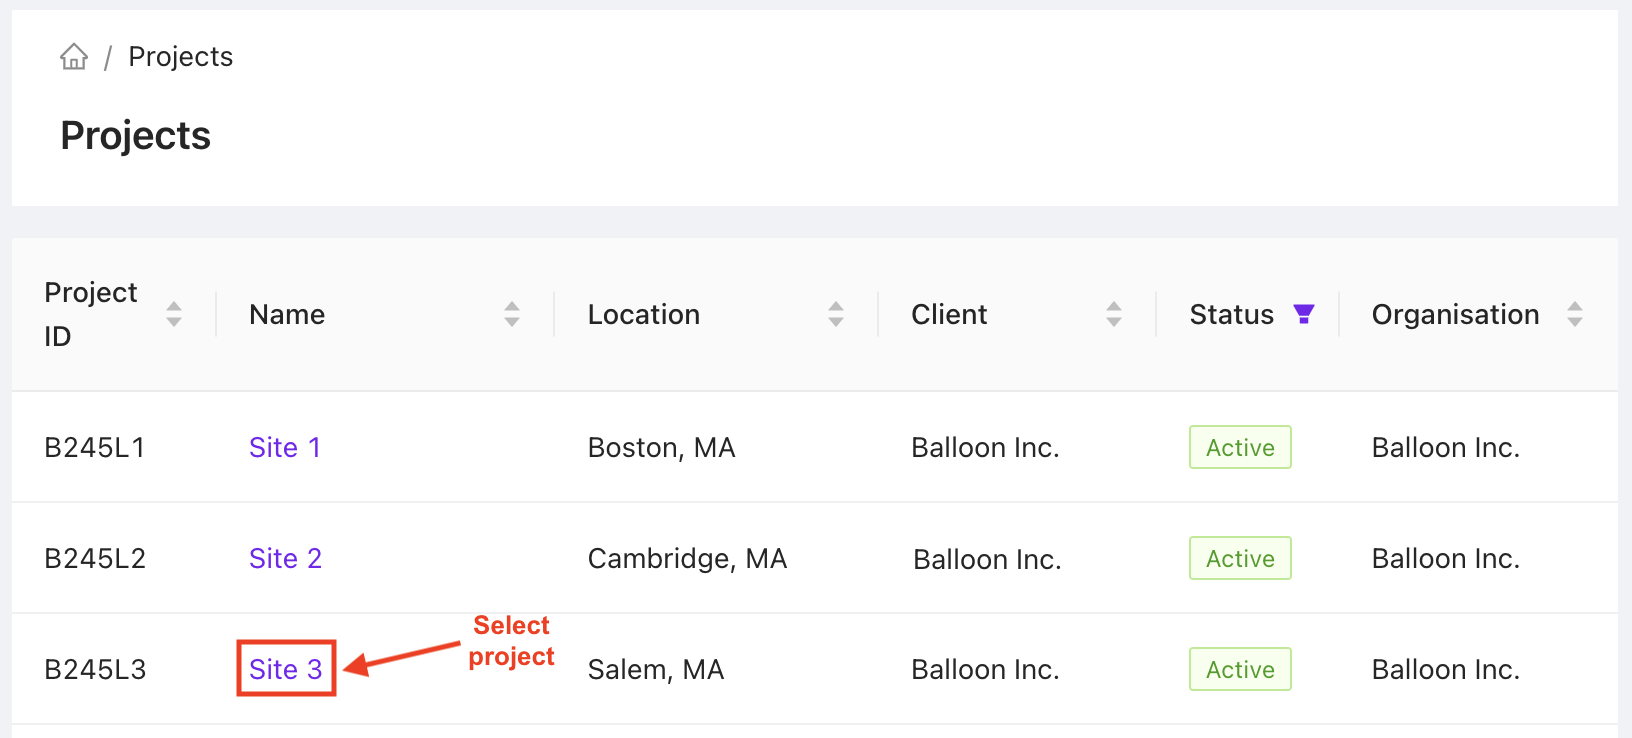
1. Select Your Project
To create an ROI on a camera, first select the project that camera belongs to from the project page.
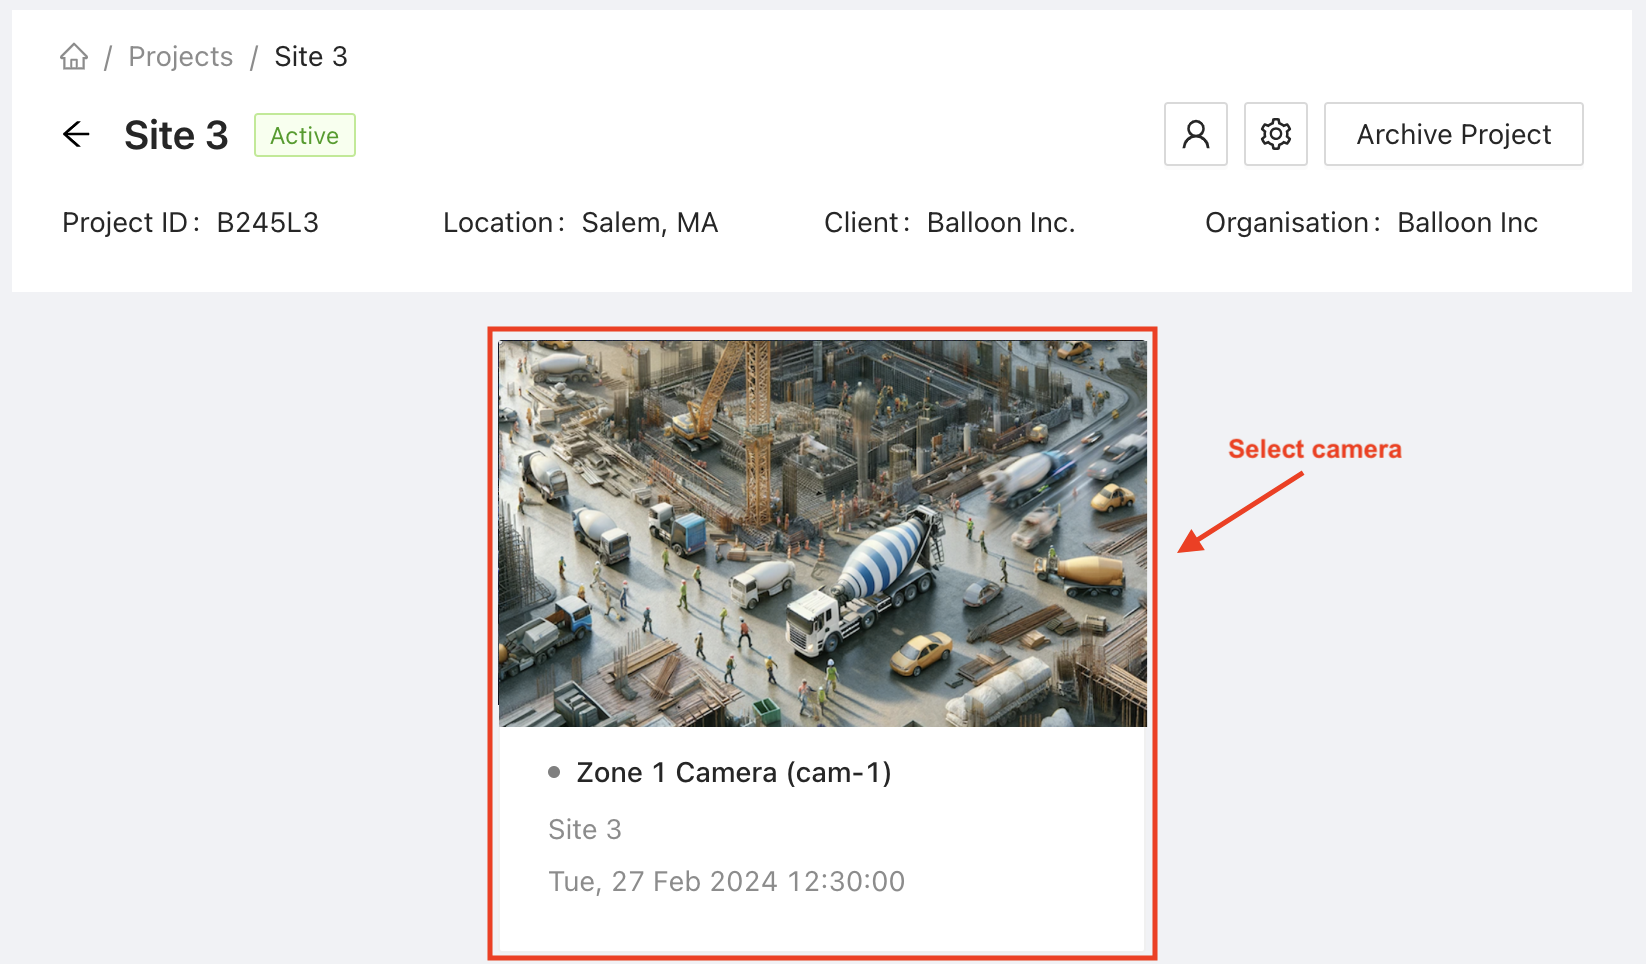
2. Select Your Camera
From the project page, select which camera you'd like to add your ROI to.
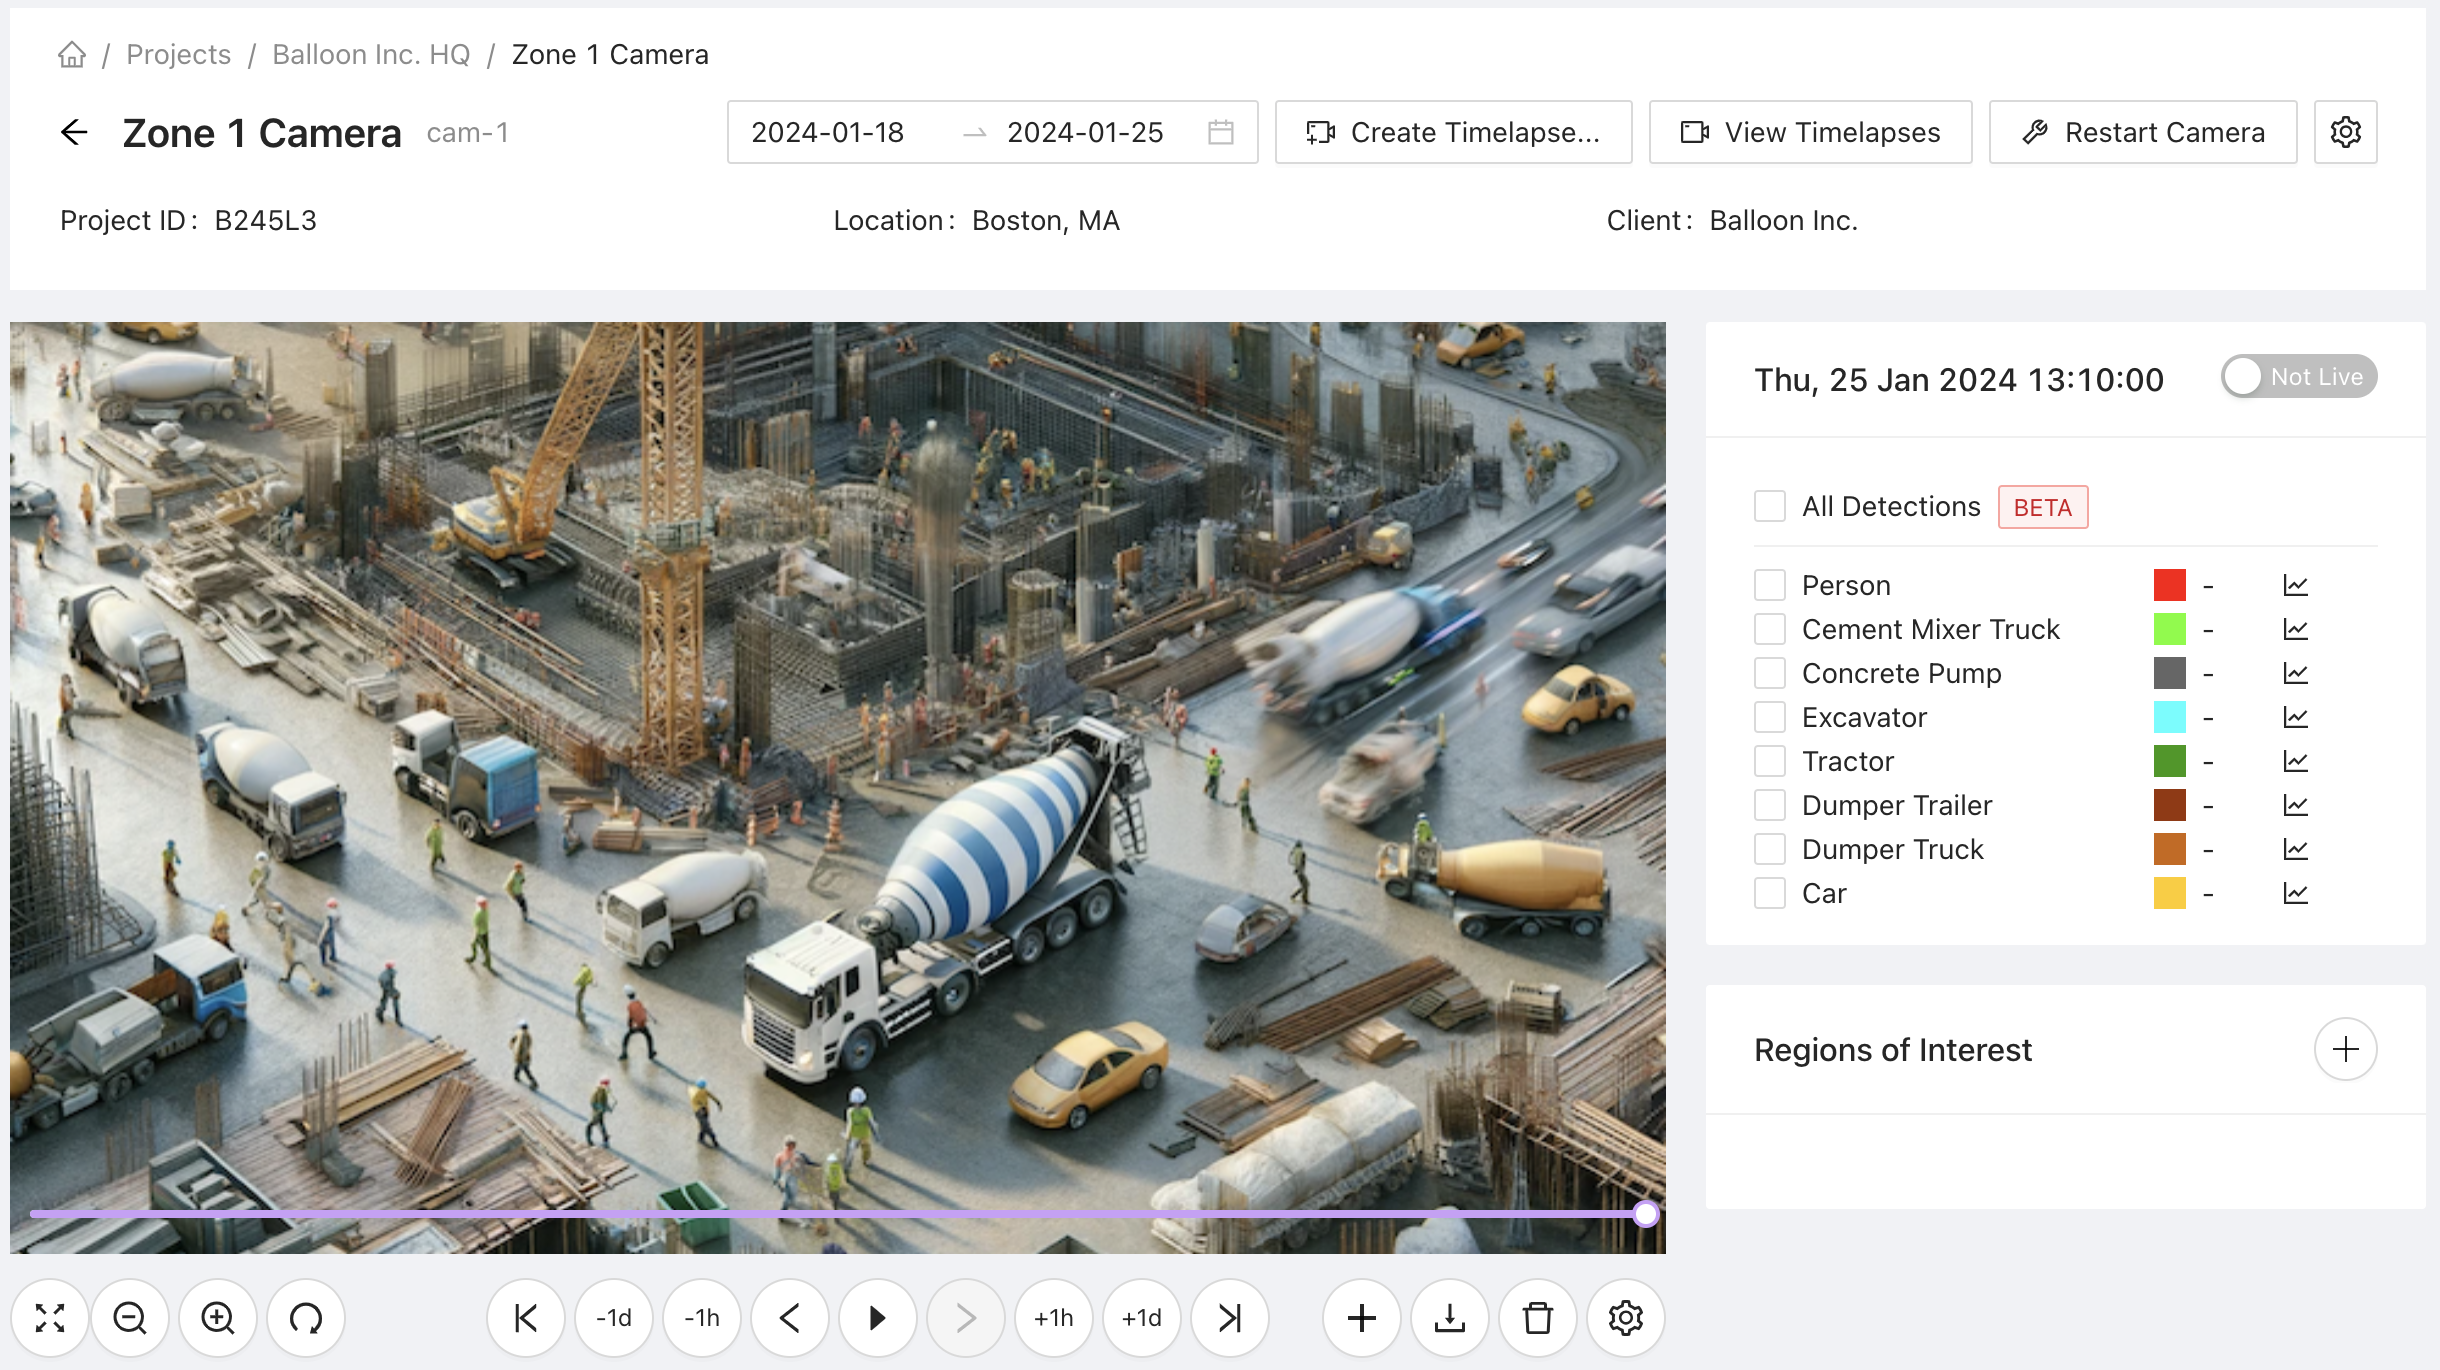
3. Click on the Add Region of Interest Button
From the camera view, click the add region of interest button located at the bottom-right of the page.
4. Name Your New ROI
Give your new ROI a meaningful name so you can easily identify it.

5. Define Your New ROI
Decide where you like your ROI to be located on the camera image. To define it, click on points around your desired area to create a border. The newly-created ROI will be indicated via a blue polygon on your camera image.

ROI Tools
- Remove a point: Double click on a point to remove it.
- Add an extra point: Click on a line to add an extra point to that segment.
- Finish adding points: Use the escape button on your keyboard to finish adding points.
- Start again: Click the Reset Drawing button to start over.
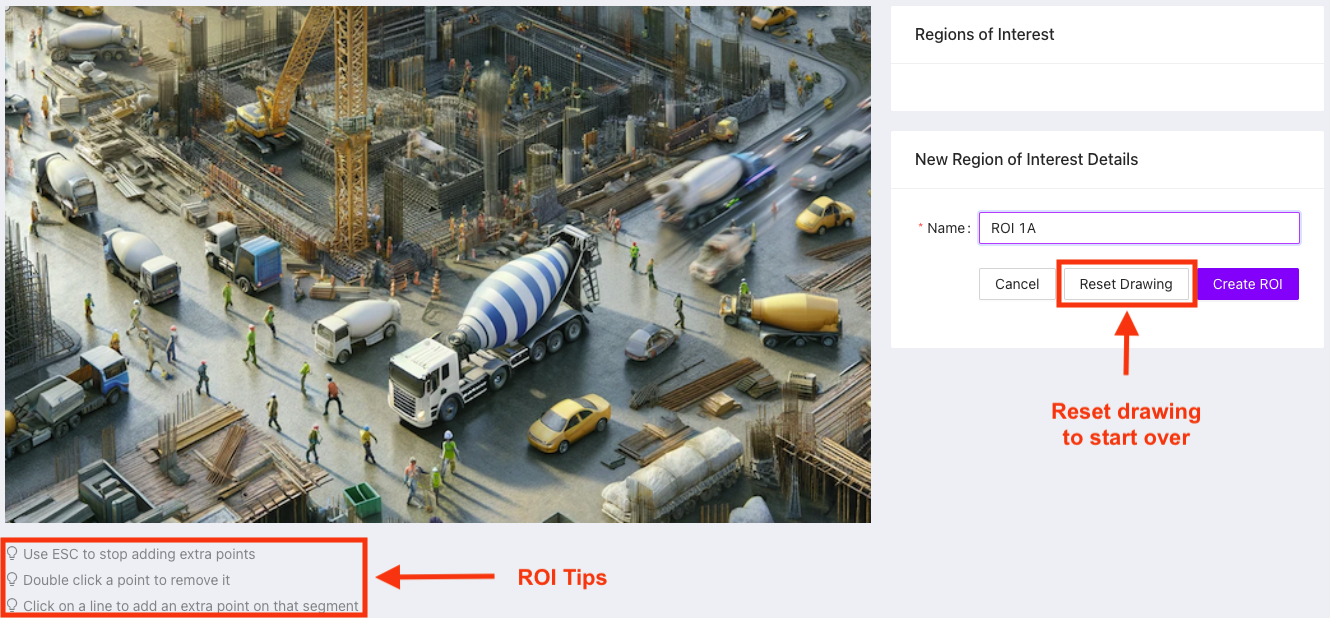
Once you're happy with your ROI, click the Create ROI button to save.
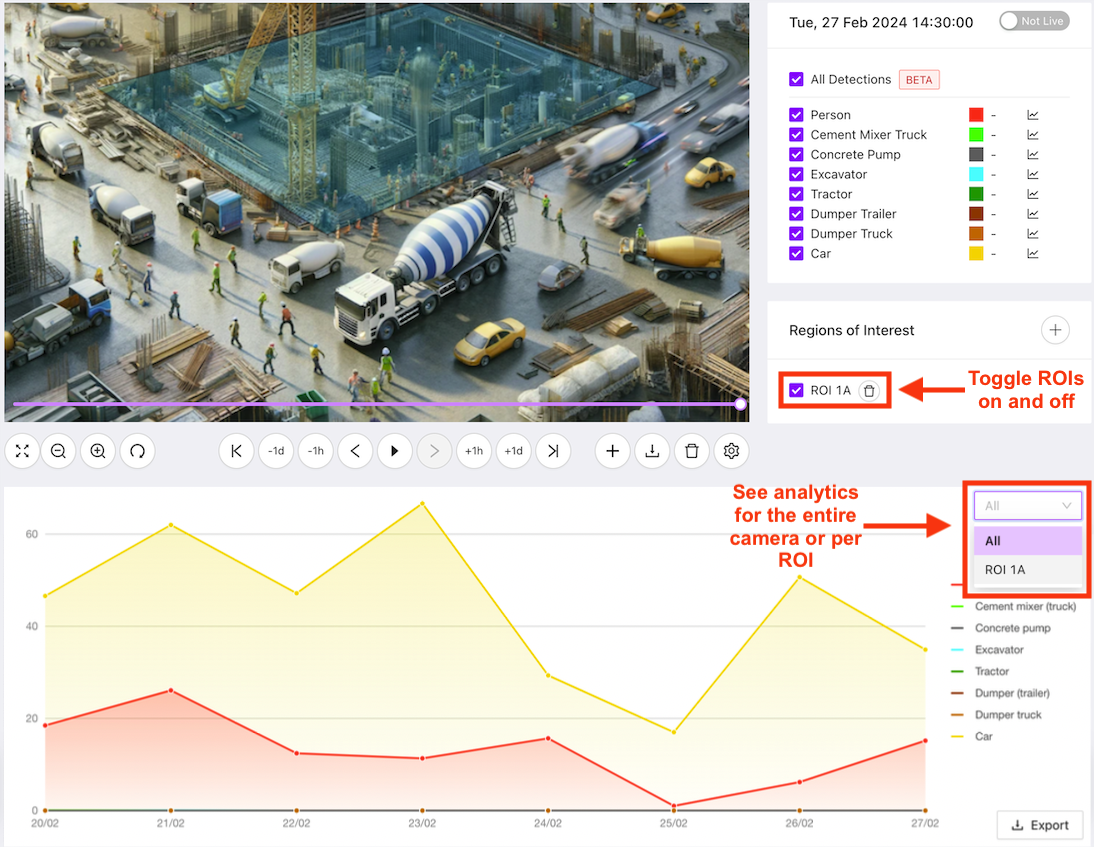
Using ROIs
View Analytics per ROI
ROIs allow you to get clearer insights on specific areas of your cameras. You can now see analytics either for the whole camera or drill down into the details by selecting an ROI.
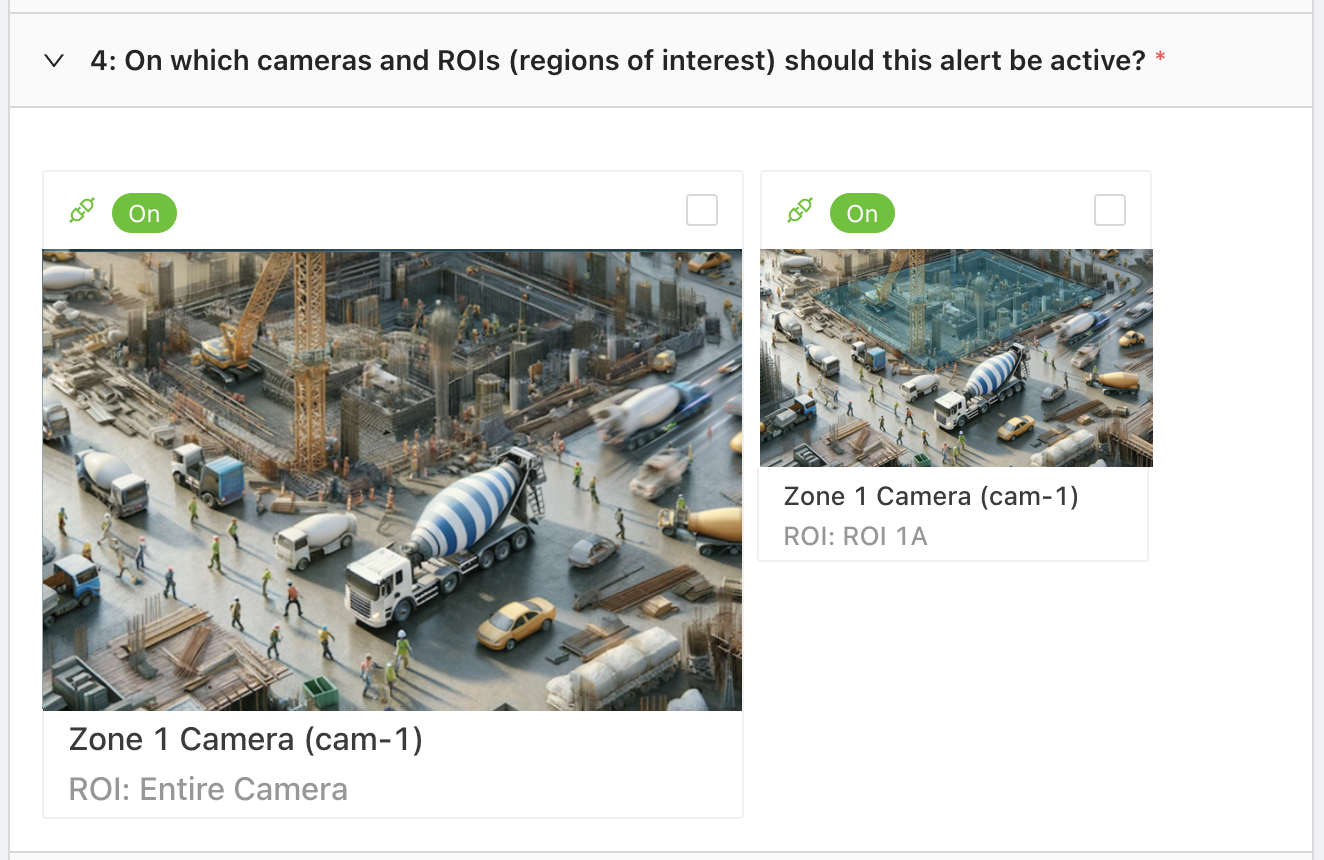
Create ROI-Specific Alerts
Customise your alerts by defining ROIs. Alerts can be set both per camera and per ROI, letting you track new events in the areas that matter most to you. To learn more about alerts, see our alerts guide.
Contact Us
We want to hear what you think about our ROIs feature as well as anything else AICON-related, so drop us a line at support@aicon.construction.