Getting Started with Alerts
Aicon's alerts give you more control over your projects by allowing you to remotely keep track of new events on your construction site.
You can:
- Create an alert to notify you when a certain detection is made, for example when a specific piece of equipment arrives.
- Select the cameras and regions of interest on which you'd like your alert to be active.
- Choose your alert schedule so you're only notified about events during specific hours.
- Decide which recipients will be notified in the event that your alert is triggered.
Creating an Alert
To create a custom alert, visit our create alerts page.
It's best to go through the alert creation process in the order it appears as certain steps will only become available if previous steps have been completed. For example, you'll only be able to see your available cameras and/or ROIs after selecting a project.
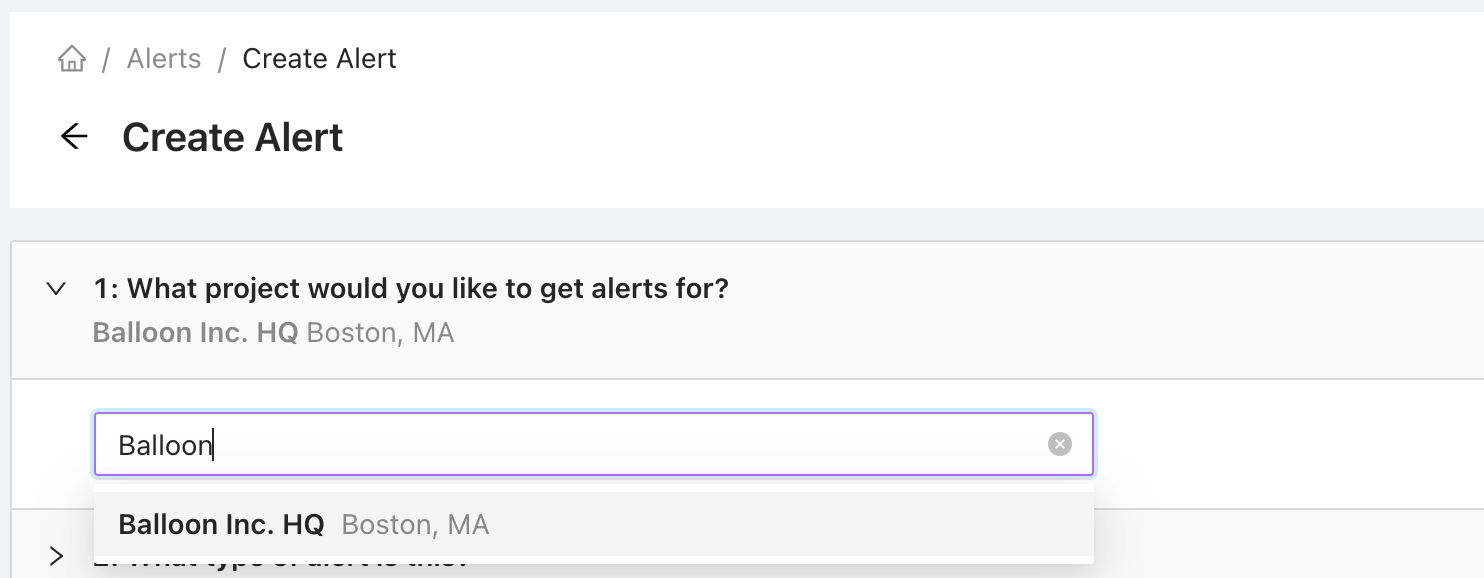
1. Select Your Project
Decide which project you'd like to work with. All available projects are shown in the dropdown. You can find them either by scrolling or typing in the text box.
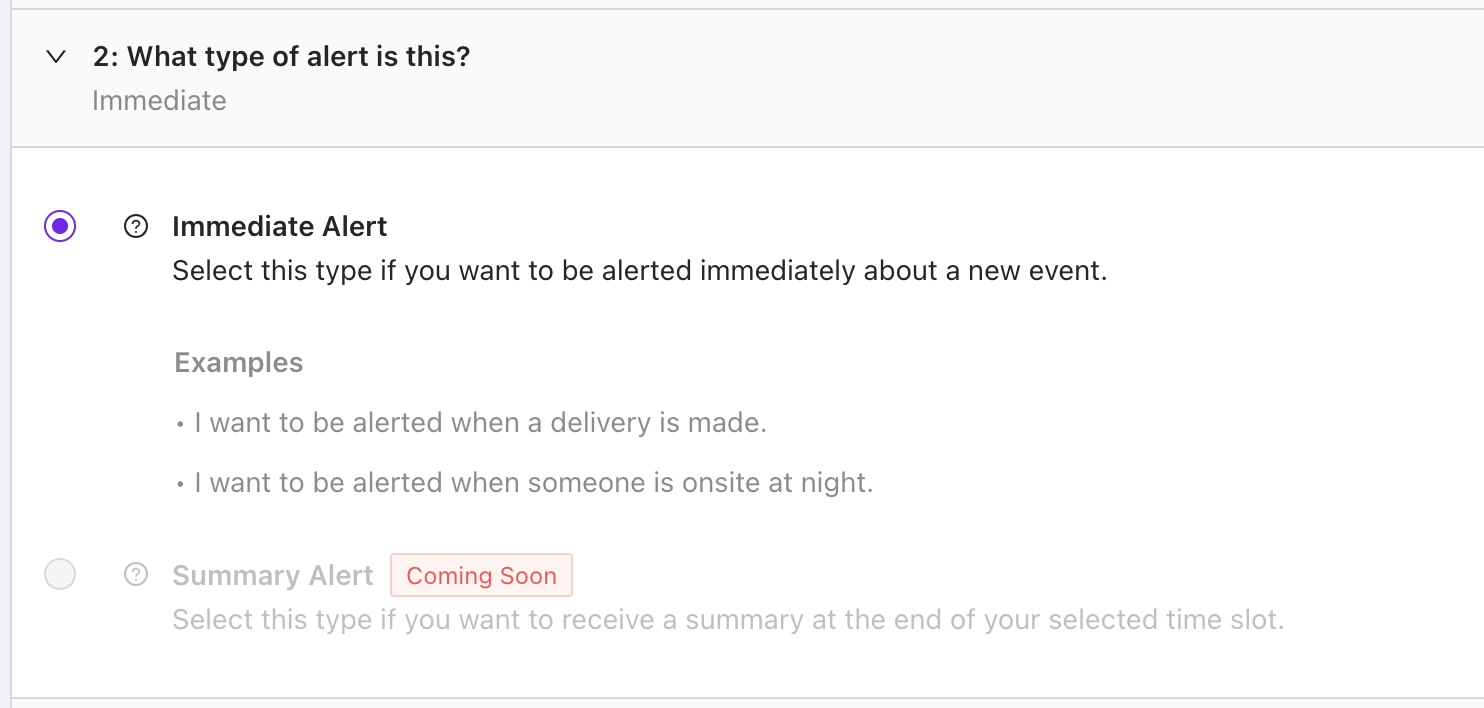
2. Choose a Type
Select the type of alert you'd like to create. Immediate alerts notify you as soon as your alert is triggered while summary alerts provide you with an overview of what has happened at the end of your alert period.
Only immediate alerts are currently available.
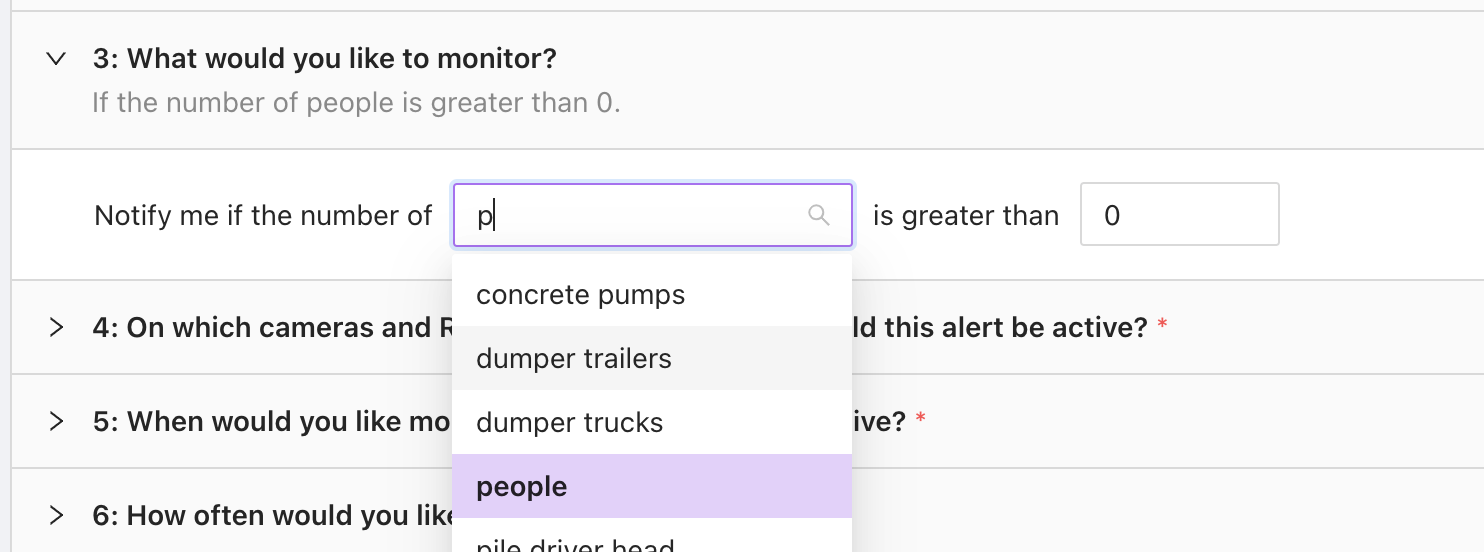
3. Decide What to Monitor
Choose what you'd like to monitor from the options in the dropdown menu. You're currently only able to select one type of object per alert. To detect additional object types, you can create another alert.
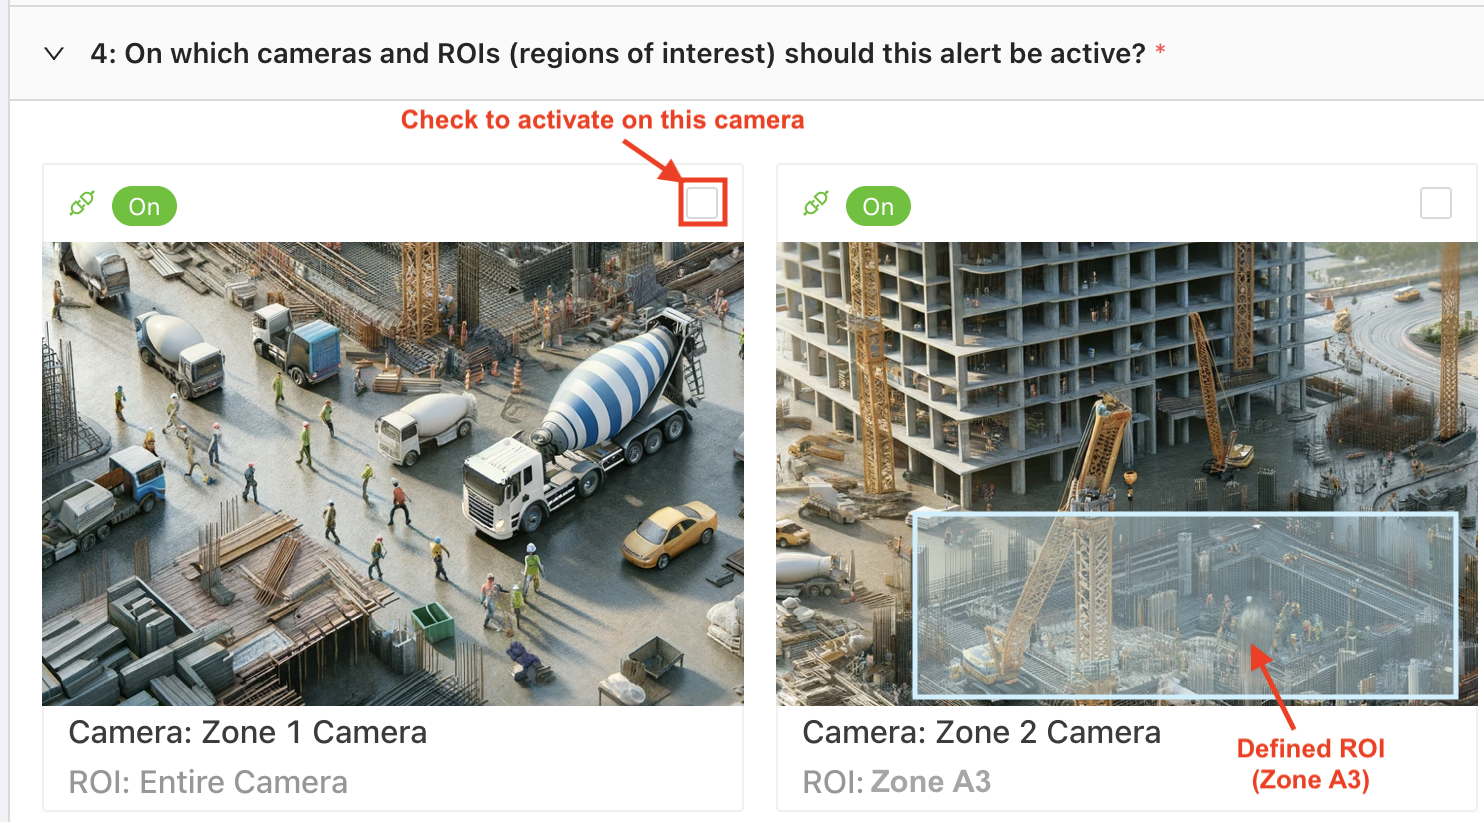
4. Select Cameras and ROIs
Check the checkbox(es) of the cameras and/or ROIs (Regions of Interest) you'd like this alert to be active on. If you wish to use an ROI, ensure that it has already been created via the camera interface, as ROIs cannot be defined during the alert creation process. To learn more about ROIs and how to create them, please see our ROI guide.
In the example below, we can see that Zone 1 Camera does not have any ROIs defined so the alert would be active on the entire area captured by the camera. There is an ROI defined on Zone 2 Camera, so here we would have the option to activate the alert on either that ROI or the entire camera.
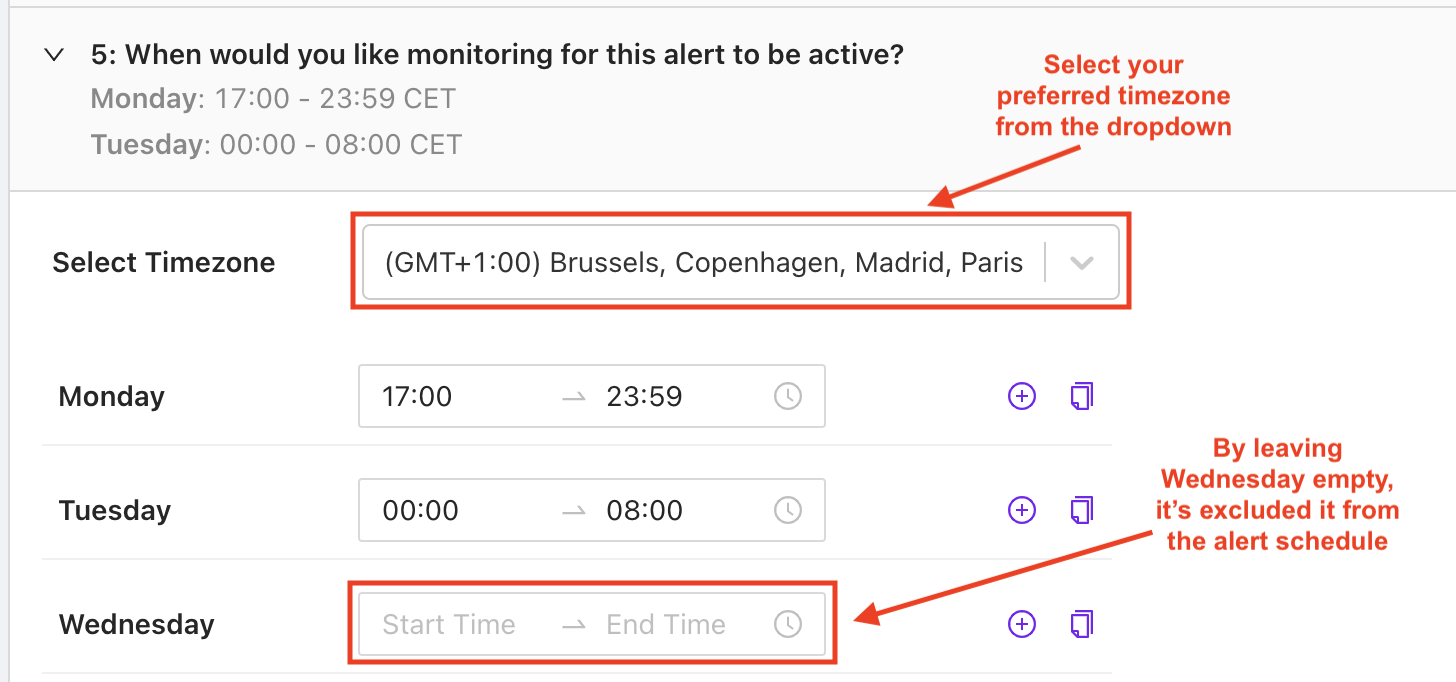
5. Create a Schedule
Decide on the time periods during which you'd like your alert to be active. If there are days on which you don't want your alert to be active, leave them empty.
Scheduling Tools
- Timezone selector: The timezone selector will default to the timezone of the project you've chosen but you can select another from the dropdown.
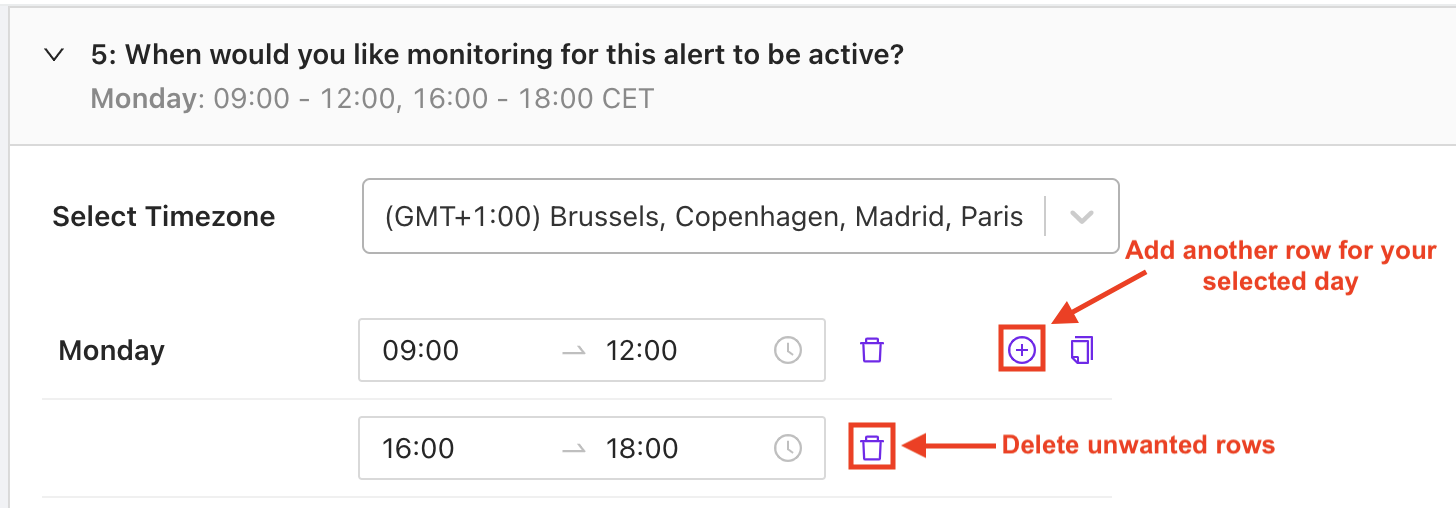
- Add row button: Use the add row button to add another row for a chosen day. For example, if you'd like your alert to be active on Mondays from 09:00 until 12:00 and then again from 16:00 until 18:00, you can enable this by having two rows for Monday.
- Delete row button: Delete unwanted rows using the delete row button. Note that this button only appears if there is more than one row for that day.
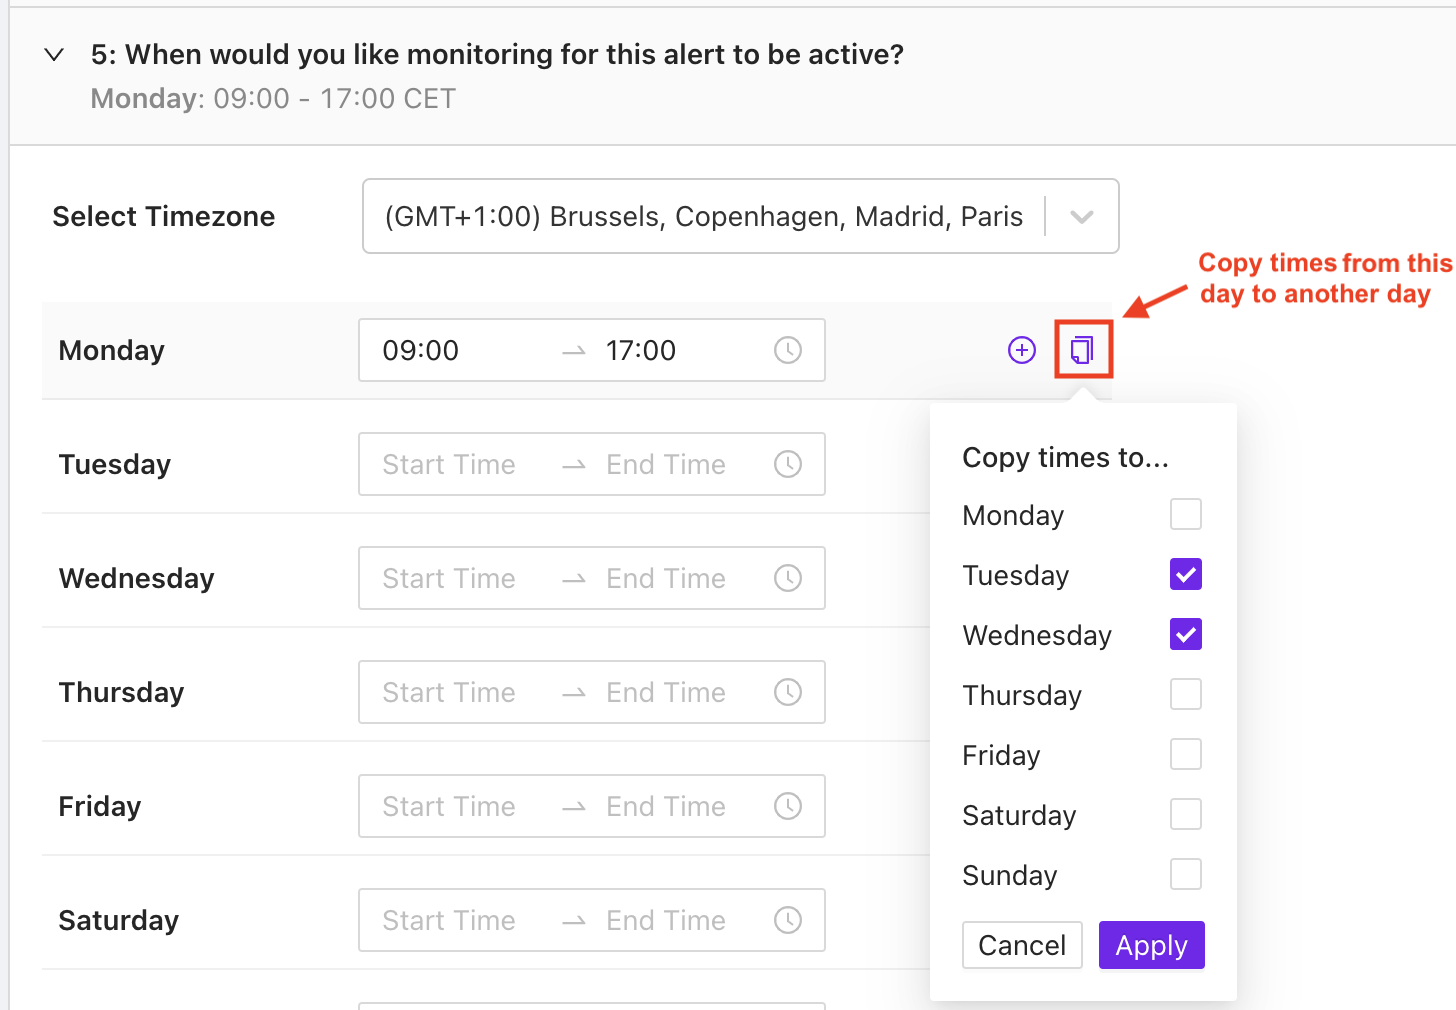
- Copy button: Use the copy button to copy your settings from one day to another. For example, if you have defined a schedule for Monday and also want it to be active on Tuesday and Wednesday, use the copy button on Monday and select the days to copy to.
6. Set a Timeout
You might not want to be notified every single time your alert is triggered. You can therefore mute your alert for a number of hours.

For example, if you set a 1 hour timeout and your alert is triggered, the flow would be as follows:
- Something on your construction site triggers your alert.
- You receive a notification telling you that your alert has been triggered.
- You then don't receive a notification for that alert for at least 1 hour, even if the alert is triggered again.
- If the alert is triggered again after 1 hour, you will receive another notification.
7. Select Recipients
Decide who should receive a notification in the event that your alert is triggered. The recipient dropdown shows a list of the contacts associated with your organisation, from which you can select one or more. You can also manually enter the email address of anyone else you would like to receive the notification, even if they're not listed in the dropdown.

8. Name Your Alert
Give your alert a suitable name so you can easily identify it.

9. Save Your Alert
The final step is to save your alert. Every field must be completed before you're able to save. If the save button is grey, as in the example below, it probably means there's something that still needs to be completed.
A grey save button means information is missing.

A purple save button means you're ready to go!

Viewing Alerts
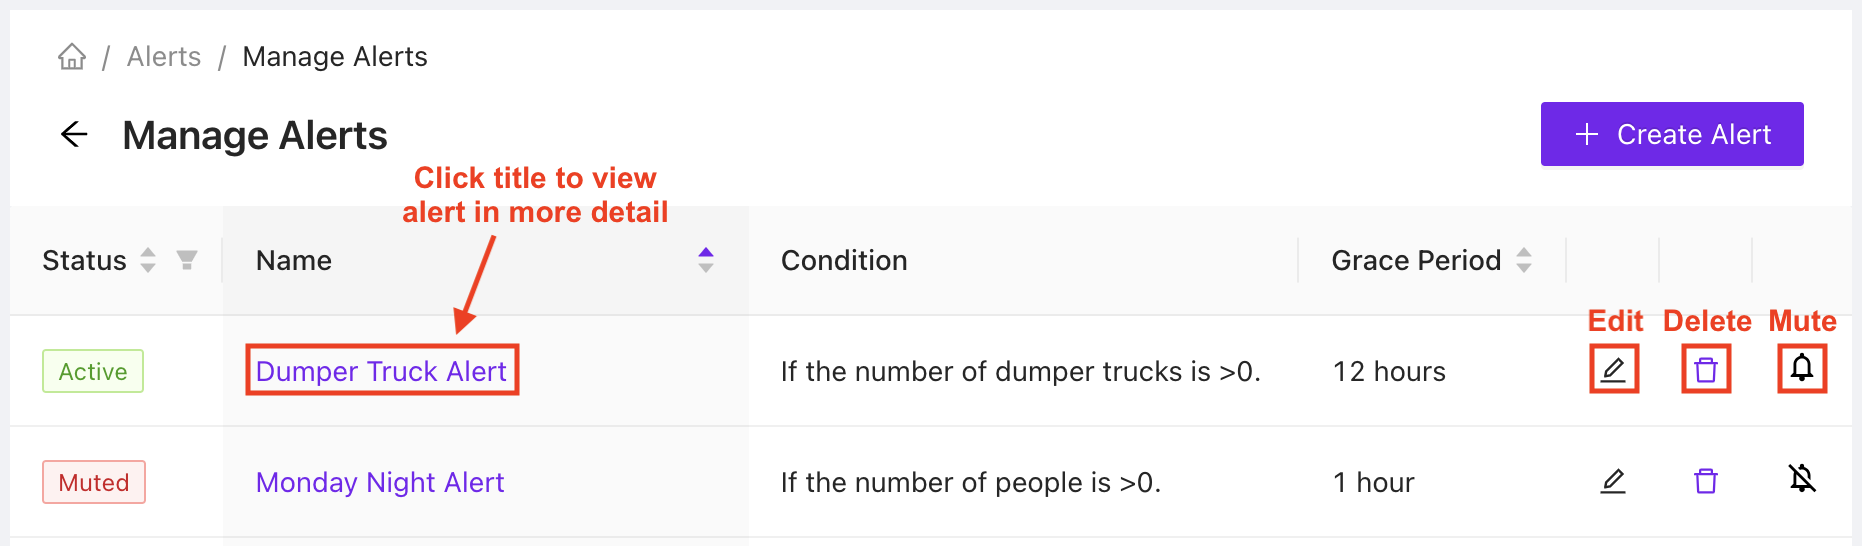
You can see all alerts created by your organisation by going to the manage alerts page.
Manage Alerts Tools
- Edit: If you need to change your alert settings, find it in the list and click edit.
- Delete: If you no longer need an alert, you can delete it from the manage alert page. This change cannot be undone, so consider muting your alert if you think you may need it again in the future.
- Mute: If you want to keep your alert but don't want it to be active for a while, you can choose to mute it. Once muted, you can also unmute the alert from this page. The alert's muted status is shown in the table.
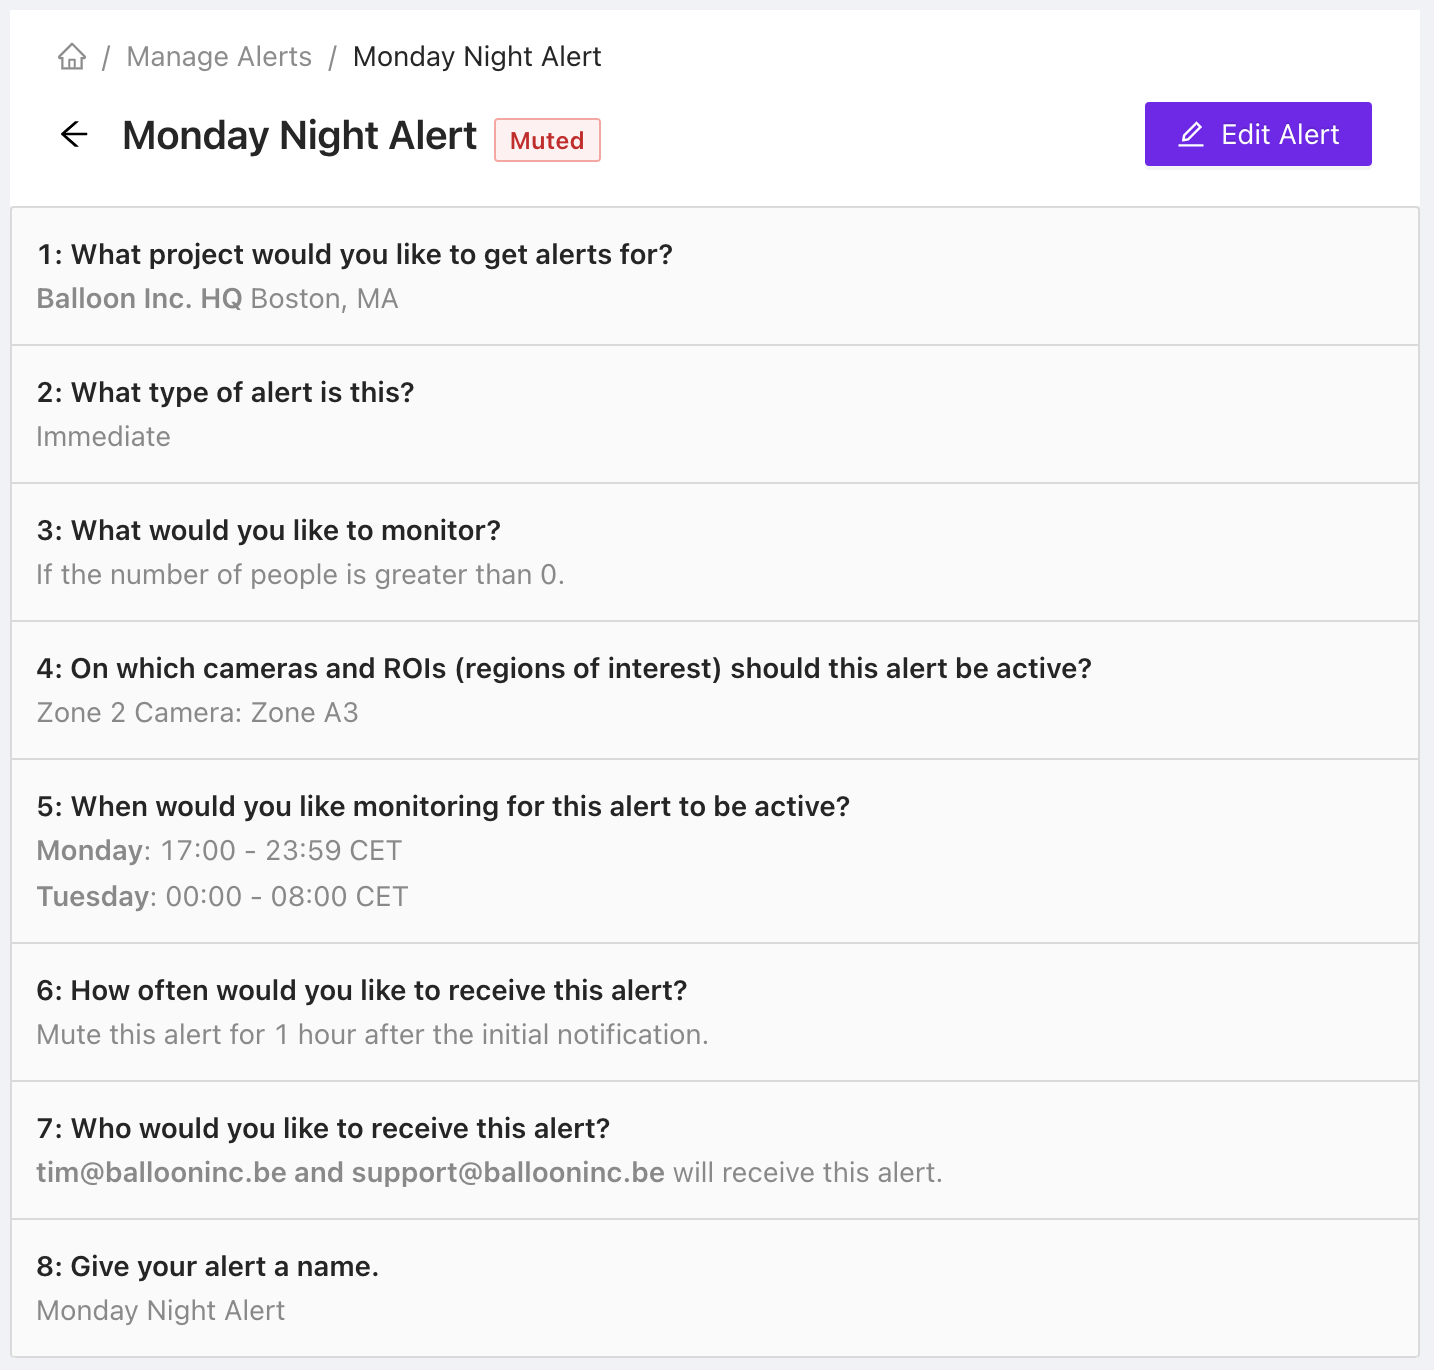
You can also view an individual alert in more detail by clicking on the title in the table. From here, you can see all settings as well as choose to edit the alert.
Alert Notifications
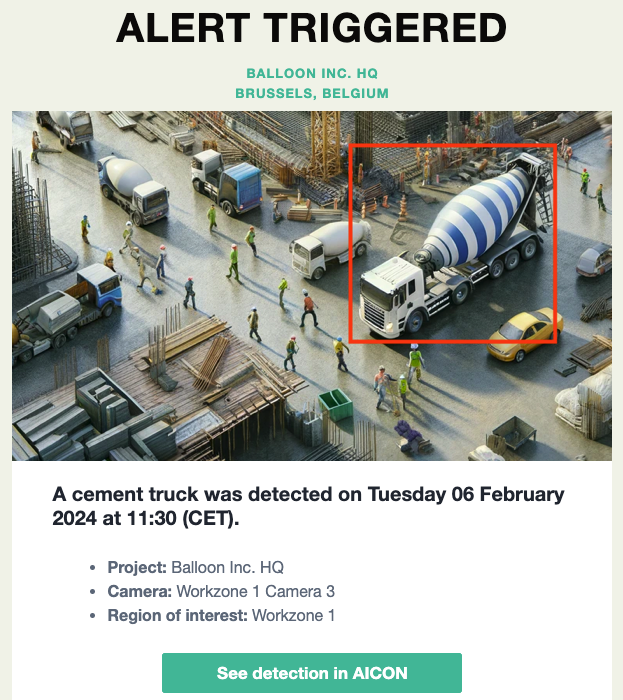
If your alert is triggered, your chosen recipients will receive an email notification.
Viewing Triggered Alert Notifications
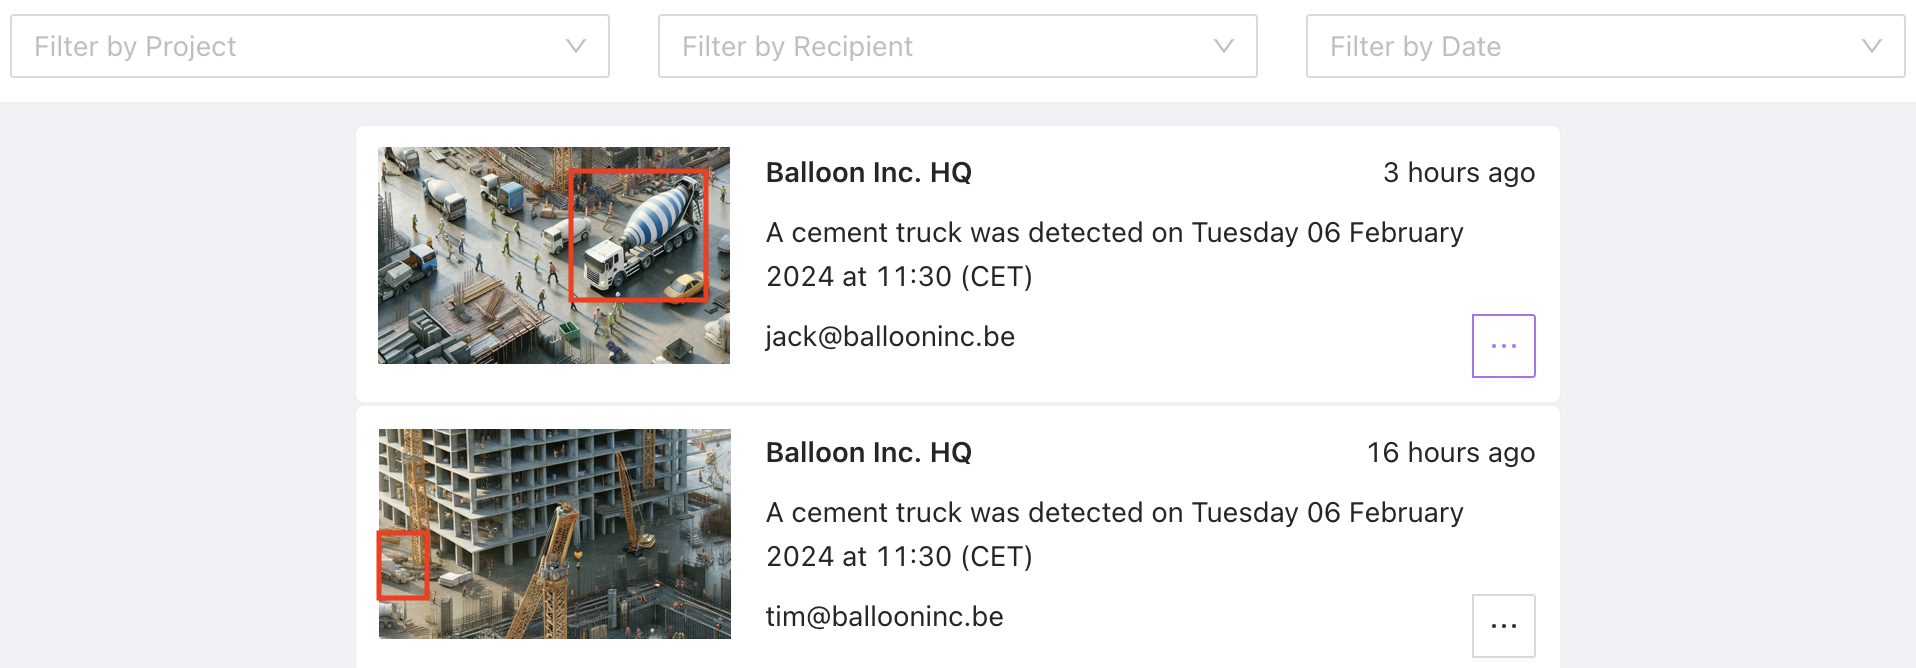
To see all notifications for triggered alerts in your organisation, you can visit our alerts page.
Triggered Alerts Notifications Tools
- Filter: You can filter the triggered alert notifications by project, recipient, or date using the filters at the top.

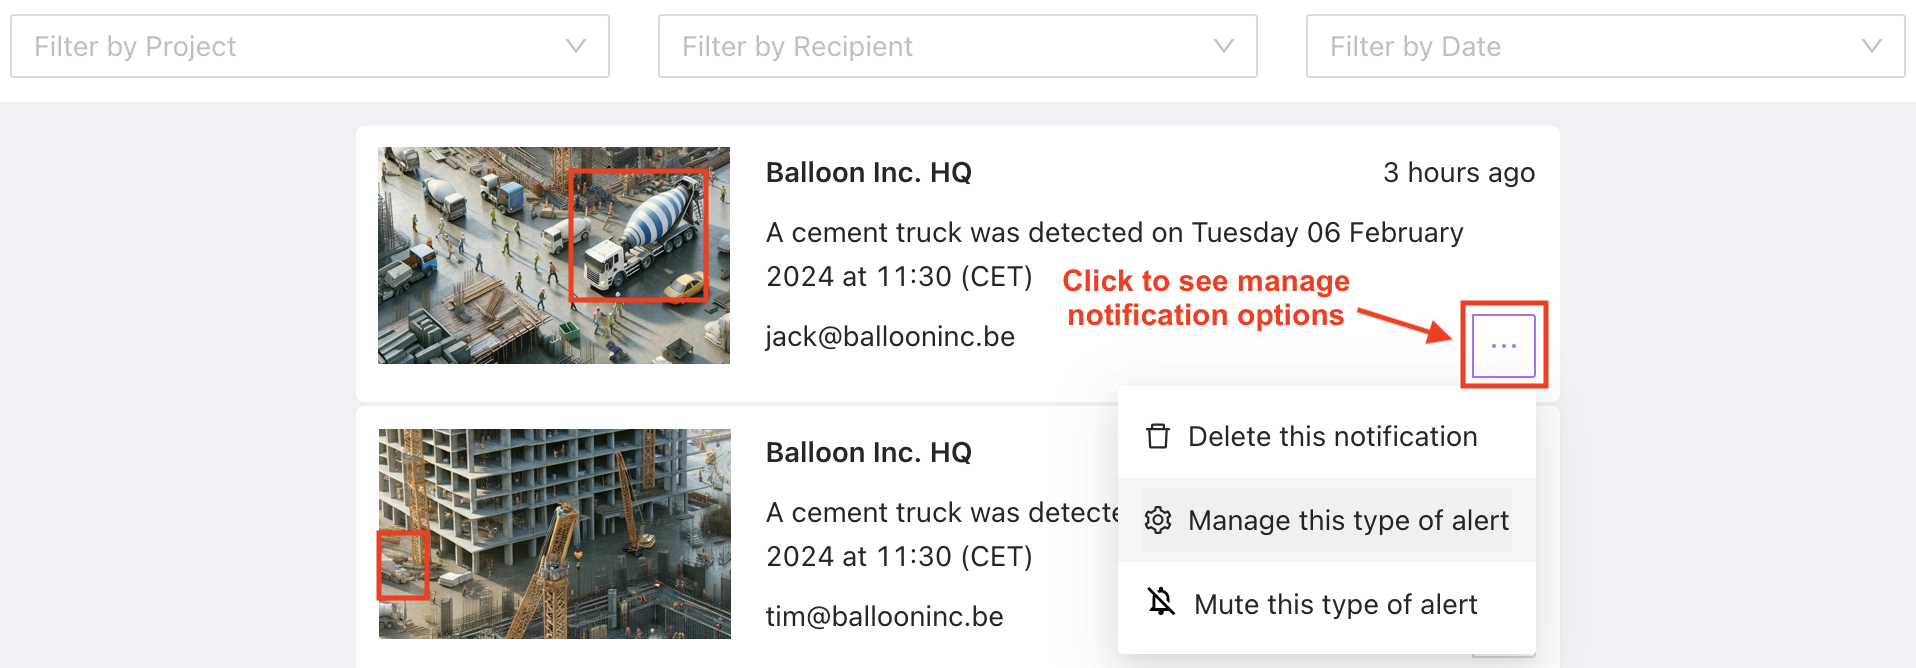
- Delete: Delete by selecting from the menu in the bottom right-hand corner of the notification card. This will only delete the notification and not the actual alert.
- Manage: Edit the alert type.
- Mute: Mute (or unmute) the alert type.
Contact Us
We want to hear what you think about our alerts feature as well as anything else AICON-related, so drop us a line at support@aicon.construction.